Banded Report Options
Select which report bands to use
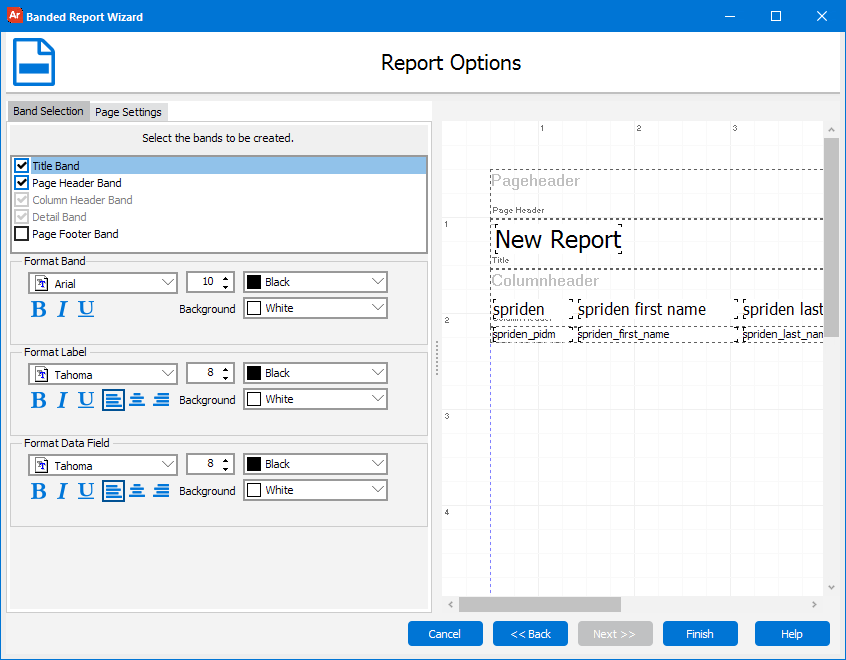
Here you can choose which report bands to include on your banded report. Simply check the checkbox to add the band to your report.
Available bands you can choose from:
- Page Header - prints at the top of every page. This band is useful for printing the report date, page number, etc.
- Title - prints at the top of the first page (only), just beneath the Page Header band (if it exists). This band is useful for printing the report title, report parameters, etc.
- Detail - prints once for each record in the dataset. You should not add a Detail band if one already exists.
- Summary - prints at the bottom of the last page (only), just after the last Detail record.
- Page Footer - prints at the bottom of every page.
When a band is selected, you can choose the default options for objects added to that band by editing the Format Band, Format Label, and Format Data Field options below.
Once you complete the report wizard you can edit the report in design mode. There you will have the ability to make further changes to the report bands. Simply, right-click on a band and select Edit to open the Band Properties Editor.

Page Settings

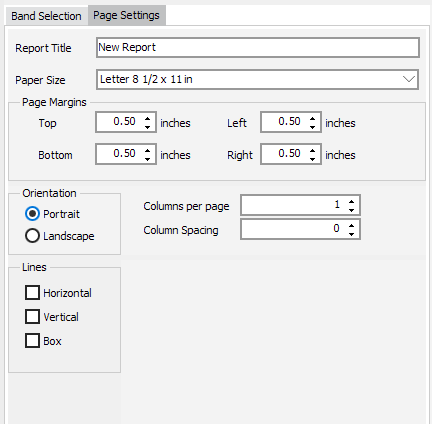
This dialog box lets you give their report a title, specify how many columns you want on a page, and decide the orientation of the page.
- Report title - This is the title that will appear in the Title Band on the report.
- Paper Size - Set the paper size for your report.
- Page Margins - Set the top, bottom, left and right margins for your report.
- Orientation - This lets you determine the orientation of the report pages.
- Columns per page -Specify how many columns you would like on the page. For example, if you had a listing of just last names, you may want to have the list in two columns per page. When the list gets to the bottom of the first page it will create a second column on that first page and continue the listing before it goes to the next page.
- Column spacing - This controls how much space there will be between the columns. (Columns on each page must be greater than 1).
- Lines - Turn on or off border lines for the detail band and column header band.
To see an overview of the process for creating a new report, return to the beginning of the New Report Definition wizard.
If you need additional help creating Banded Reports, refer to the Getting Started with Banded Reports page.